Joy to the world, the Lord has come!! Wishing you all very Merry Christmas blessings!
**In case you're wondering, the sign says "Waiting for Mei-Mei" :) Hee hee!!
Tuesday, December 25, 2012
Monday, December 24, 2012
Pony Party
Well, the world didn't burst into flames on the 21st like the Mayans predicted, but the Noodle did turn 6. This year, she had a party. With friends. Stepping into the big leagues! The theme? Horses and ponies--of course!
We decided to keep it pretty low-key and just have it at home. On a couple of the RSVPs the question was asked whether or not a real pony was going to be present...alas no...not in our yard. In December. It seemed like all the youngsters still had fun though, live pony or not.
While all the guests arrived, they girls busied themselves by coloring some horse pictures and playing with the toy horses. Once everyone got here we played a couple rounds of Pony BINGO and then pin-the-tail-on-the pony. I read a pony picture book while J got the cake ready and the table set. Then it was on to ice cream and birthday cake. We rounded out the afternoon with the opening of presents. Quite a few sequeals of joy and oooohs and aahhhs by both young and old:)
There was a little time at the end, so the girls decided to break out the Noodle's new gifts and try their hands at playing with them. When the 2 hours were up, the parents starting arriving and each little girl left with her very own thank-you long sleeve pony t-shirt.
There were a couple of parents who stayed for the party. They commented at how calm the girls were and how smoothly everything had gone. Everyone seemed to have a good time and have fun, so I'd say that the first "friend party" was a success!!
We decided to keep it pretty low-key and just have it at home. On a couple of the RSVPs the question was asked whether or not a real pony was going to be present...alas no...not in our yard. In December. It seemed like all the youngsters still had fun though, live pony or not.
While all the guests arrived, they girls busied themselves by coloring some horse pictures and playing with the toy horses. Once everyone got here we played a couple rounds of Pony BINGO and then pin-the-tail-on-the pony. I read a pony picture book while J got the cake ready and the table set. Then it was on to ice cream and birthday cake. We rounded out the afternoon with the opening of presents. Quite a few sequeals of joy and oooohs and aahhhs by both young and old:)
There was a little time at the end, so the girls decided to break out the Noodle's new gifts and try their hands at playing with them. When the 2 hours were up, the parents starting arriving and each little girl left with her very own thank-you long sleeve pony t-shirt.
There were a couple of parents who stayed for the party. They commented at how calm the girls were and how smoothly everything had gone. Everyone seemed to have a good time and have fun, so I'd say that the first "friend party" was a success!!
Thursday, December 13, 2012
Fa la la la la!
The Noodle is becoming much more particular in her thoughts regarding clothes, hair accessories (or lack there of), etc. Ha! I knew it was just a matter of time ;). Thankfully this year she has to wear a
uniform, so mornings are pretty smooth...next year just might be a different story!
Last night was her school choir concert. The plan was that she was going to wear her Christmas outfit (turtleneck and sweater with the skirt). 10 minutes before we're suppose to leave, she informs me that her music teacher said they were not suppose to wear turtlenecks because it would be too hot up on stage. When I tried to let her know that it would be o.k., she became very indignent and said that I was not to make her break the rules and that her teacher said so! Now, as an aside, there was a lengthy letter that came home regarding what the kiddos were and were not suppose to wear, and there wasn't any mention about turtlenecks....anywhoooo, she ran upstairs and pulled out this shirt I just finished for her and declared that it would be o.k. to wear this. Thank goodness it matched! BTW, the only reason she agreed to a bow was because her babysitter very sweetly asked her to so that she would be spotted up on stage--thanks J!
I used this t-shirt via Pinterest (unfortuantely the link isn't working...sorry to whoever originally created this cutie!) as the inspiration but re-worked the color combo.
Interested in making one for yourself? Great...here's how I did it!
Supplies:
1 long sleve t-shirt (thank you Tar-Jay)
2 different colors of ric-rac
1 coordinating ribbon
matching thread
1. I started at the base of the tree and cut my ric-rac approx. 8 in. long. Pin it in place to keep it straight and then sew it on.
2. I continued alternating ric-rac and ribbon, getting smaller by the inch (7", 6", 5", etc.) and sewing them into place.
By the time we got home it was 8:30 and someone had fallen asleep in the car. J brought her in and put her down so he could take off his coat. I tell ya, when she's out, she's out!
Labels:
C.N.'s clothes,
Christmas,
DIY
Saturday, December 8, 2012
Visit with Santa
Today was a first for us--a visit with Santa. In years past, the Noodle was always pretty apprehensive about hangin' with the Man in the Red Suit. She had, in fact, no desire to go see him, talk to him or really even be relatively close to him. I almost didn't even bring up about 'breakfast with Santa' this year, but at the last minute, threw it out there. She was interested.
Her school had it well organized (because really, it's crazy enough during the holidays and who wants to deal with chaos associated with an unorganized Santa visit?!) so we ate a yummy breakfast and then went in to do a craft or two before it was her turn to go up.
After they reviewed her top-3 wish items (My Little Ponies, a horse in a carrying case and a talking Spiderman) she was popped up onto his lap, smiled and then hopped down. No fear. I'd say it was a success!
Monday, December 3, 2012
Hello Monday--wedding style
Hello there! J and I had a nice, little get-away this past weekend and celebrated a soroity sister's wedding. There was love in the air--December weddings are beautiful, aren't they? It also doubled as a birthday mini-break for me. Woo-Hoo :)
Hello to marrying your best friend.
Hello to dear, sweet friends. My cheeks and tummy hurt from laughing so much!
Hello to "throwing diamonds" with soroity sisters...and some International officers!
Hello to December--Christmas is just right around the corner and I'm thrilled to start decking the halls!
Hello to turning another year old and (perhaps) a little wiser?! Linking up with Lisa and her hellos.
Hello to marrying your best friend.
Hello to dear, sweet friends. My cheeks and tummy hurt from laughing so much!
Hello to "throwing diamonds" with soroity sisters...and some International officers!
Hello to December--Christmas is just right around the corner and I'm thrilled to start decking the halls!
Hello to turning another year old and (perhaps) a little wiser?! Linking up with Lisa and her hellos.
Thursday, November 29, 2012
Festive Door Hanger
So the calendar is about to flip over to December. Full speed ahead with the Christmas decorations!!
I found this cute door hanger on Pinterest and knew I could re-create it. I had quite a few pieces of silver/silver plate from Lollie that had been up in the attic since, mmm 1970? when she and Papa got married, so I thought why not bring it down and put it to use? As an FYI, the creamers/sugar bowls/pitchers were all found atGoodwill for about $4.50 each.
Here's what you need:
--a tray with handles (if you don't have anything hanging around, try a thrift store, garage sale, theGoodwill, you get the idea)
--some greenery (either artificial or the read deal--mine was faux)
--a creamer, sugar bowl or small pitcher (see note above)
--2 different colored ribbons
Start by gathering the greenery into a bundle. I used 3 boughs and rubberbanded them together at one end. Next I used a twist-tie to attach them to the handle of the tray. Fluff out the boughs.
Next take your ribbon and thread it through the handle of the creamer, sugar bowl and/or pitcher. Tie it to the handle of the tray.
Add a contrasting ribbon for decoration and viola! Instant festive door hanger :)
Now see if you can stop yourself from making a few of these guys!!!
BTW, I used fishing line threaded through the handle to hang it up. Enjoy!
I found this cute door hanger on Pinterest and knew I could re-create it. I had quite a few pieces of silver/silver plate from Lollie that had been up in the attic since, mmm 1970? when she and Papa got married, so I thought why not bring it down and put it to use? As an FYI, the creamers/sugar bowls/pitchers were all found at
Here's what you need:
--a tray with handles (if you don't have anything hanging around, try a thrift store, garage sale, the
--some greenery (either artificial or the read deal--mine was faux)
--a creamer, sugar bowl or small pitcher (see note above)
--2 different colored ribbons
Start by gathering the greenery into a bundle. I used 3 boughs and rubberbanded them together at one end. Next I used a twist-tie to attach them to the handle of the tray. Fluff out the boughs.
Next take your ribbon and thread it through the handle of the creamer, sugar bowl and/or pitcher. Tie it to the handle of the tray.
Add a contrasting ribbon for decoration and viola! Instant festive door hanger :)
Now see if you can stop yourself from making a few of these guys!!!
BTW, I used fishing line threaded through the handle to hang it up. Enjoy!
Wednesday, November 21, 2012
New bathroom--reveal
One of the things that our house desperately needed was a second bathroom. My parents always talked about putting one in, but never did. Fast forward to today. It was high on our list when we were figuring out the renovations.
We decided to take the old family room, which was quite large, and create a powder room, a laundry room and a mud room. The laundry room is just about finished (we'll save that for another post) and the bathroom got (just about) finished up over the weekend. Yeah! The long weekend should help make the mudroom a reality by Sunday--fingers crossed.
J continues to work like a machine. He installed the toilet/shower/sink, put down the tile on the floor, tiled the shower, painted, hung the lights, and on and on and on. What did I do? Ahem....sewed some ric-rac onto the guest towels and "foo-fooed" (is that a word) it up. Big score was on the mirror which I found atGoodwill for $7.00. I seem to be finding more and more there--I'll blame Pinterest.
Enjoy the photos (especially Uncle and Aunt C)!
Here is what the family room looked like for a couple of "before" shots. Now, before La-la goes nuts because the room is suuuuch a mess, I'll throw in that these pictures were taken on moving day (before the movers had gotten down there to finish packing). So a huge amount of stuff was piled in there...
This above pic is the side where the bathroom and the laundry room are now located. The door on the left is an old closet that was taken out. The door on the right goes into the garage.
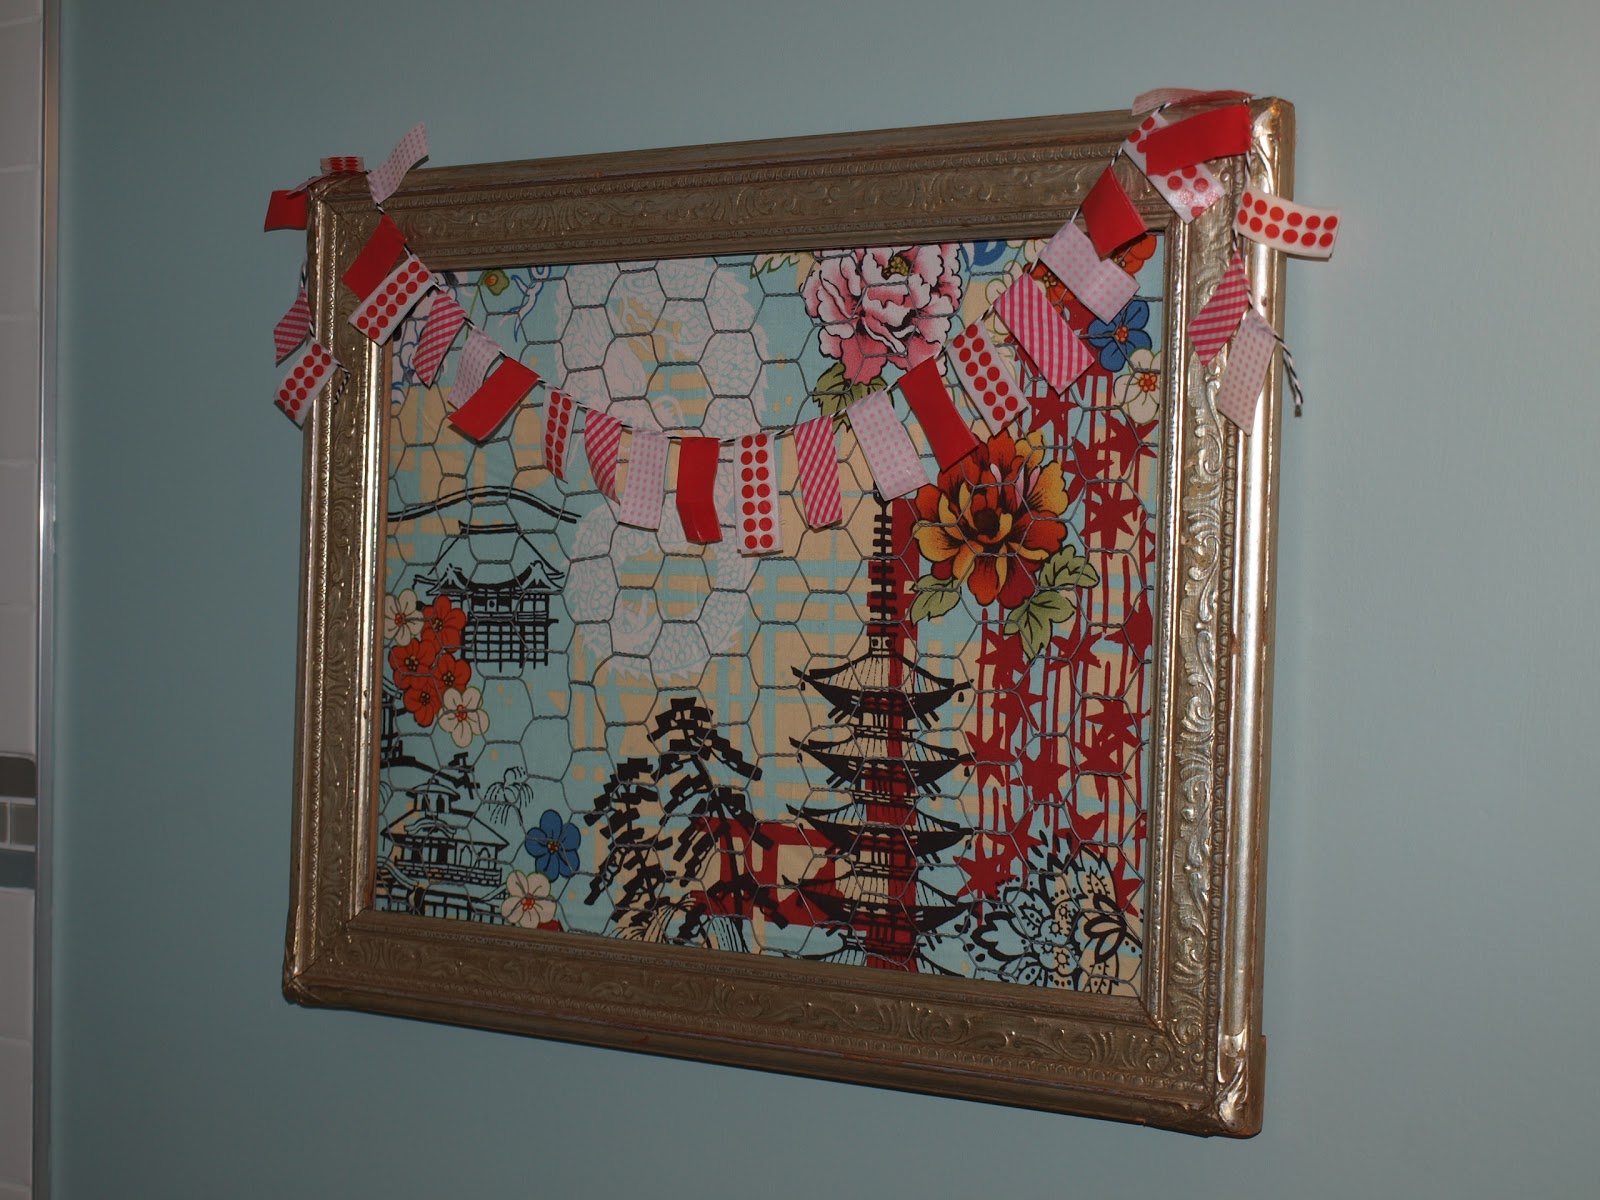
My little contributions--againGoodwill for the frame ($3.50 but it was marked 50% off for the day--I found 2) and the towels.
There's that bunting that I love. The frame was up in the attic holding an old wedding photo of my Nana. Don't worry--we saved the photo but put the frame to better use than just collecting dust. Inspiration fround via Pinterest....here. Chicken wire was lurking around in the garage. Fabric was from a top I made.
MyGoodwill mirror--like a phoenix rising from the ashes of yucky faux gold to gorgeous red.
The shower stall with the subway and glass tile. Love!
We decided to take the old family room, which was quite large, and create a powder room, a laundry room and a mud room. The laundry room is just about finished (we'll save that for another post) and the bathroom got (just about) finished up over the weekend. Yeah! The long weekend should help make the mudroom a reality by Sunday--fingers crossed.
J continues to work like a machine. He installed the toilet/shower/sink, put down the tile on the floor, tiled the shower, painted, hung the lights, and on and on and on. What did I do? Ahem....sewed some ric-rac onto the guest towels and "foo-fooed" (is that a word) it up. Big score was on the mirror which I found at
Enjoy the photos (especially Uncle and Aunt C)!
Here is what the family room looked like for a couple of "before" shots. Now, before La-la goes nuts because the room is suuuuch a mess, I'll throw in that these pictures were taken on moving day (before the movers had gotten down there to finish packing). So a huge amount of stuff was piled in there...
This above pic is the side where the bathroom and the laundry room are now located. The door on the left is an old closet that was taken out. The door on the right goes into the garage.
You can see the door into the garage peeking out to the far left of this picture. This shot is where the mud room is going.
And...here it is!
My little contributions--again
There's that bunting that I love. The frame was up in the attic holding an old wedding photo of my Nana. Don't worry--we saved the photo but put the frame to better use than just collecting dust. Inspiration fround via Pinterest....here. Chicken wire was lurking around in the garage. Fabric was from a top I made.
My
The shower stall with the subway and glass tile. Love!
Labels:
home improvement
Subscribe to:
Posts (Atom)